 novityinfo
Avidemux – The Complete Tutorial and Review for Beginners
Advertisement
When you're new to video editing, finding the right tool can feel like a lot. You don’t want something too complicated, but you still need features that actually get the job done. That's where Avidemux steps in. It's a free video editor that’s built for beginners who want something simple but effective. You won’t need a tech degree to figure it out, and once you get the hang of it, you’ll wonder why you ever worried about editing in the first place.
What Is Avidemux and Why Should You Care?
Think of Avidemux as your friendly video editing starter kit. It's open-source, which means anyone can use it without paying a dime. Yet, it still covers basic needs like cutting, trimming, encoding, and filtering videos. It supports a wide range of formats, including AVI, MP4, and MKV. This means you can edit pretty much anything you shoot on your phone or camera or download from the internet.
The interface is clean, without too many buttons cluttering the screen. So, if you usually get overwhelmed looking at other video editors filled with endless menus and tabs, Avidemux feels like a breath of fresh air. Everything you need is right in front of you, and nothing feels hidden away behind ten different clicks. One thing to keep in mind, though: Avidemux isn't meant to create complex video projects like you would with professional software. You won't find timelines with multiple layers or advanced visual effects here. Instead, Avidemux is made for quick edits that don't sacrifice quality.
Setting Up Avidemux – Step-by-Step

Installing Avidemux is pretty much as easy as it gets. Here’s what you need to do:
Download the Correct Version
Head over to the official Avidemux website. Choose the version that matches your operating system – Windows, macOS, or Linux. Make sure you're getting the latest stable release, not a beta version, unless you know what you're doing.
Install It Like Any Other Program
Run the installer and follow the on-screen instructions. There's nothing sneaky hidden in the installation process – no extra software trying to sneak in.
Open Avidemux
When you first open it, you’ll be greeted with a blank window and a basic toolbar. Don’t be intimidated by the emptiness. It’s designed to start simple and stay simple.
First Time Settings Tip
Before you load your first video, go to the preferences menu. Here, you can choose your default output folder, set autosave options, and configure audio settings if needed. These tiny tweaks save you time later.
Getting Started with Your First Edit
Ready to make your first cut? Here’s how you do it:
Loading Your Video
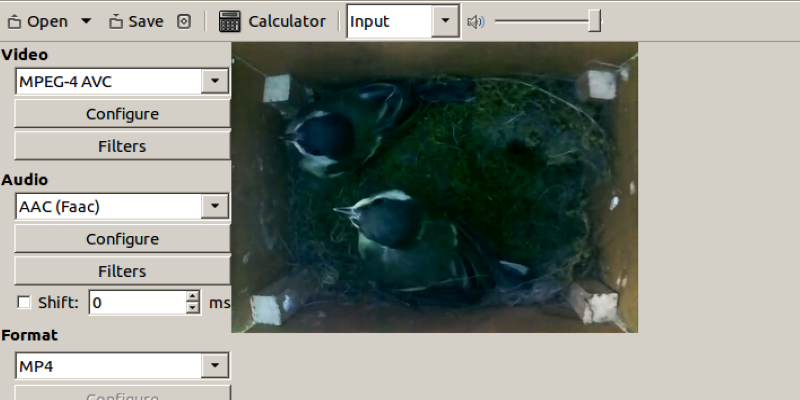
Click the "Open" folder icon at the top left. Browse your video and load it. You'll see the video appear in the playback window.
Cutting and Trimming
Want to remove a section? Use the A and B buttons to mark the start and end points of the section you want to cut. Then, hit the delete key on your keyboard. That's it. No complicated dragging and dropping involved.
Choosing the Output Format
On the left side of the screen, you’ll see options to select the video output format. You can keep the same format as your original video by setting "Copy" under Video Output, Audio Output, and choosing "Copy" under Output Format too. If you want to change formats, select your new format from the list.
Adding Simple Filters
If you want to crop your video, resize it, or sharpen it a little, click on "Filters." A list of video filters will pop up. Pick what you want, adjust the settings, and preview how it looks before applying.
Saving Your Edited Video
Once you're happy, click the "Save" icon (the one with the floppy disk). Don't forget to manually add the correct extension to your file name, like .mp4 or .avi, depending on what format you choose. Avidemux doesn't do this for you automatically.
Core Features That Make Avidemux Worth It
Direct Editing Without Re-encoding
Avidemux lets you edit your video without re-encoding it if you choose. This means the quality stays the same, and the editing process is super fast. It's a lifesaver when you just want to cut out a part of a video without waiting hours for re-rendering.
Simple Audio Handling
You can easily remove audio tracks, replace them, or just mute them altogether. If you're dealing with a video that has annoying background noise, this feature comes in handy.
Automated Tasks With Jobs
For those who like things even quicker, Avidemux has a job queue system. You can set up multiple edits and let the program process them all at once while you go do something else.
Basic Subtitle Support
Need to hardcode subtitles into a video? Avidemux can do that, too. It supports various subtitle formats like SRT, SSA, and ASS. You can customize font style, size, and placement before embedding them into the video.
Conclusion: Is Avidemux Right for You?
Avidemux is the kind of tool that does exactly what it promises. No bells, no whistles, just good, straightforward video editing. If you want something lightweight that focuses on the basics without overwhelming you with features you’ll never use, Avidemux will feel like a perfect fit. It’s an editor that respects your time – quick to learn, quick to edit, and quick to save your work.
So, whether you’re trimming down your latest vacation footage or converting an old home video into a new format, Avidemux gets the job done without drama. If you’re someone who values simplicity over endless options, Avidemux will probably become one of your go-to tools. It’s built for people who would rather spend more time enjoying their videos than learning how to edit them.
On this page
What Is Avidemux and Why Should You Care? Setting Up Avidemux – Step-by-Step Download the Correct Version Install It Like Any Other Program Open Avidemux First Time Settings Tip Getting Started with Your First Edit Loading Your Video Cutting and Trimming Choosing the Output Format Adding Simple Filters Saving Your Edited Video Core Features That Make Avidemux Worth It Direct Editing Without Re-encoding Simple Audio Handling Automated Tasks With Jobs Basic Subtitle Support Conclusion: Is Avidemux Right for You?Advertisement
Related Articles
How You Can Spoof or Send Fake Text Messages for Free
How to Restore the Quality of Blurry Videos Sent From iPhone to Android
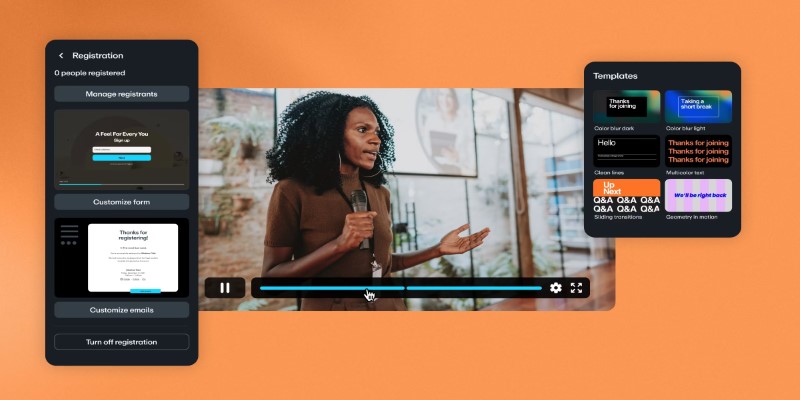
Top Webinar Platforms That Make Hosting Events Easy
Browse AI: How to Scrape Any Website Without Writing Code
Evernote Vs. OneNote: Best Note-Taking App for 2025 Use
Useful Tips to Solve OBS Audio Delay Issues: A Comprehensive Guide

Watch Later in MKV: 8 Tools to Save HD Movies Instantly

Freshdesk vs Zendesk: Find Out Which is Better in 2025

Notion vs. Evernote: A Clear Comparison for 2025
Agile Methodology Explained: A Complete Guide

ConvertKit vs. ClickFunnels: Which Platform Wins in 2025?